
A Camera is a Camera, most of the stuff I explained here are for the Owners of Intimidating Huge cameras (DSLR’s or Mirrorless) but these tips can also be beneficial for Mobile Camera’s too ( Time to use that Pro Mode on your Phone you Probably never used before)
#1. Expose and focus first, then frame your shot.
A Photo looks and feels better, when there’s a good balance between the exposure and the clarity. While there’s a lot of ways to control the light coming in / the exposure; for a better clarity of the image you’re trying to achieve, your subject should always be in focus for a good result.
#2 Perfect the Exposure Triangle.

The exposure triangle is a common way of associating the three variables that determine the exposure of a photograph: aperture, shutter speed, and ISO. One must balance all three of these to achieve a desired result, an adjustment of one requiring adjustments of at least one of the others.
ISO – The ISO indicates how sensitive the sensor or film is to light. For darker scenarios, you’ll need to use higher or more sensitive ISO settings to capture light. Higher settings generally introduce more grain or noise into the image.
Aperture – This refers to the size of the opening in the lens diaphragm. Smaller numbers mean a larger opening and more shallow depth of field in your images. Larger numbers let through less light, but make more of your image look sharp.
Shutter speed – This is the amount of time your camera’s shutter is open and the amount of time your sensor or film is exposed to light. Faster speeds can “stop” motion, while slower speeds let in more light and can capture blur and motion
#3 Pay attention to depth of field
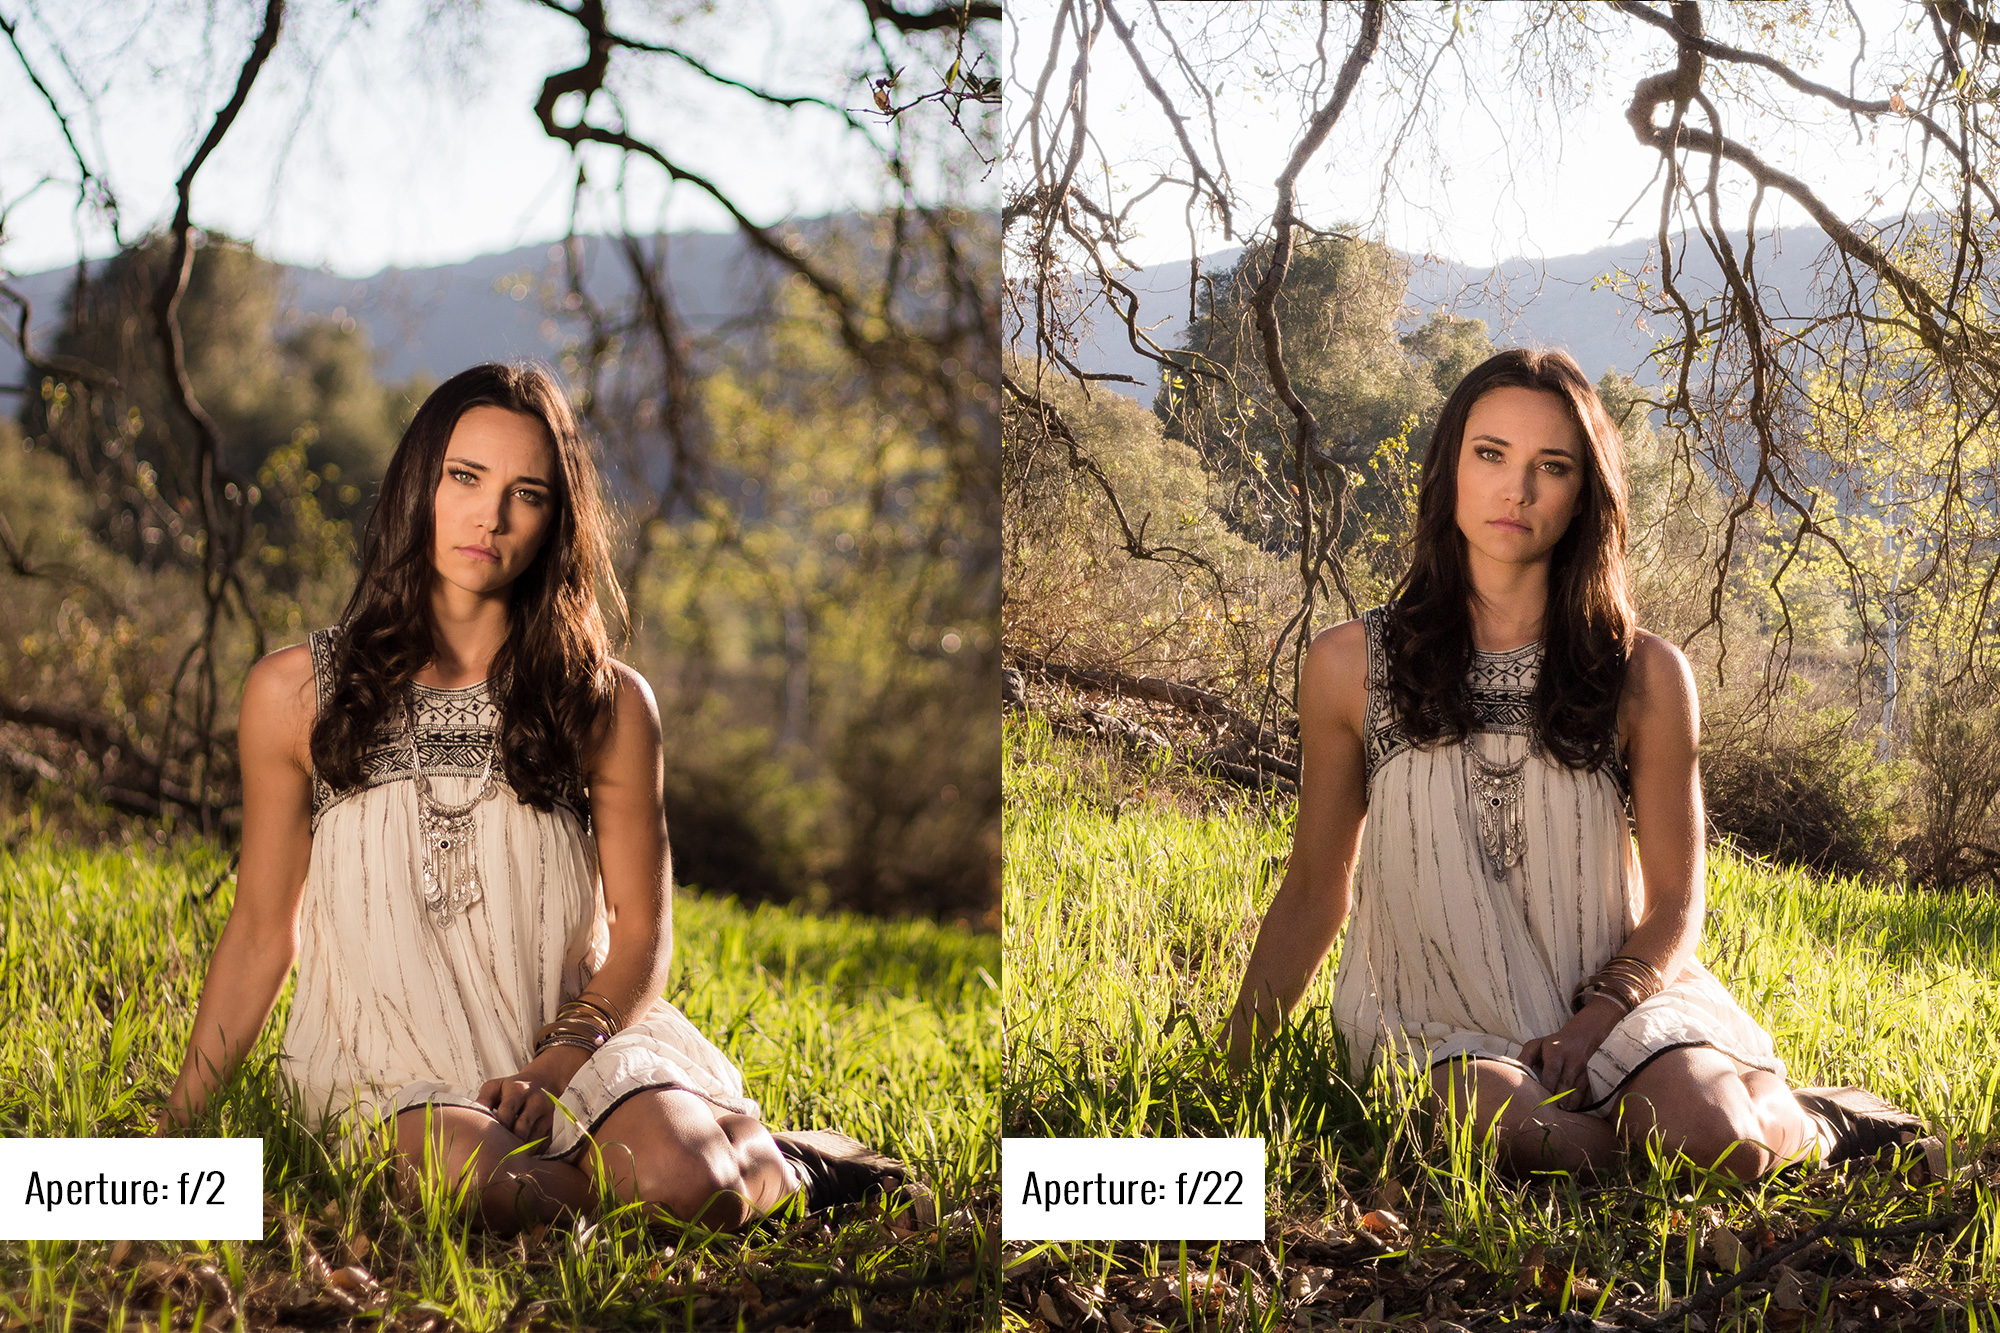
In simple terms, have a Good separation of the Background. To add another dimension to your composition, be aware of depth of field. Depth of field in photography is the relation of how sharp the plane of focus is compared to everything away from that plane.
Depth of field is largely determined by the aperture size you set and your distance to the subject. Wider apertures emphasize depth of field, and so does getting closer to your subject.
#4 Don’t use built-in flash as a primary light source.

Using built-in flash as a primary light source can create very harsh shadows and an unflattering look.
It’s mainly useful as fill flash, such as when harsh sunlight is casting dark shadows across your entire subject. It’s also helpful in emergencies when there’s almost no light around and you just want to capture an image of something—even then it will create unflattering shadows and highlights on your subject.
#5 Isolate the details.

Occasionally you’ll encounter scenes that are just too big to fit inside the frame, no matter how far back you move, or what camera lens you’re using. Don’t settle for just taking a cropped version of a photo you want.
Look for unique details or features you can focus in on and push everything else out of the frame. This can uncover hidden gems in situations when you don’t have a great scene to begin with too.